Full-body compound moves get all the credit for building muscle mass. Jacked quads? Thanks, front squat. Killer glutes? Appreciate you, deadlift. Bolder shoulders? Couldn’t have done it without you, overhead press. And while these moves certainly deserve their spot at the top of the weight training food chain, simple body weight exercises can be just as beneficial.
Take the dead hang, for example. Requiring you to grasp a bar and simply hang there, it has none of the glamour of a back squat or the strength-gaining potential of a bench press. But what it lacks in complexity, it makes up for in benefits as it counters some of the negative effects of compound moves, including tight muscles, spinal decompression, poor posture, and shoulder immobility.
We’re not suggesting dead hangs take the place of your beast mode moves. Instead, add the dead hang into your existing routine, and you may find you’re stronger and more limber than ever.
Table of Contents:
- What Are Dead Hangs?
- Differences Between Passive & Active Dead Hangs
- Benefits Of Active And Passive Dead Hangs
- Muscles Worked & Stretched During Dead Hangs
- Performing Dead Hangs: How To Do A Dead Hang
- Programming The Dead Hang
- Variations Of The Dead Hanging Exercise
Hang with us, and you’ll know everything there is to know about this exercise.

WHAT IS THE DEAD HANG EXERCISE?
Simple but effective, dead hangs are an exercise requiring you to do just what the name implies: hang. The overhead bar at the gym isn’t just reserved for pull-up variations. They also work great for the dead hang. Or, you can get creative and use whatever bar is available. We’re never opposed to utilizing a park’s monkey bars to get in an exercise or two.
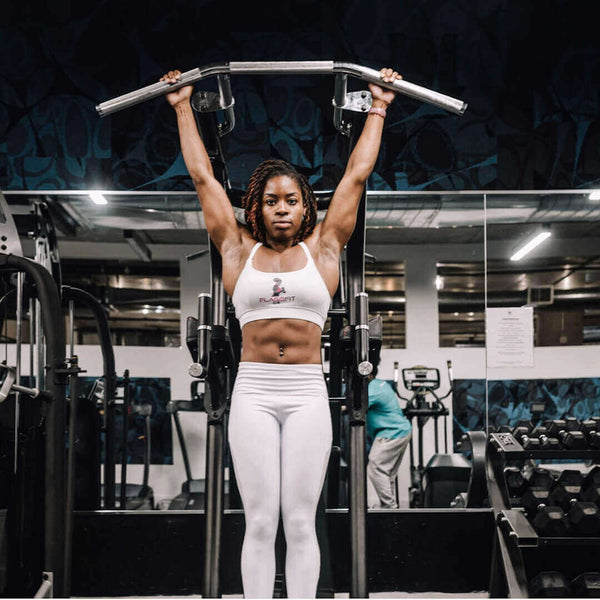
Once you’ve got your bar, align your body similarly to the way you would when performing a pull-up. With an overhand grip, hands slightly wider than shoulder-width, legs straight and off the ground, your body will hang from a bar. And as you do, you’ll reap many benefits (more on this soon!).
An important recommendation we have for the dead hang: Don’t jump up to grab the bar. Use a bench, plyo box, or anything else to line up your hands correctly before removing your legs from the box and gently letting your body hang. Jumping up to grab it places strain on your shoulder joints and doesn’t allow you to set up with proper form.
Passive Dead Hangs vs Active Hang
The neutral grip dead hang comes with choices: You can let your body hang there, treating it more as a stretch, or you can use it to build strength by isometrically contracting your muscles for the duration of the hold.
The passive dead hangs exercise position is the stretching version, in which your legs hang straight down with less focus on contraction and much more on stretching. Your shoulder joints are still activated, but the rest of your muscles should be lengthening in this version.
The active dead hang turns the stretch into a strength-building move. Once in position, focus on holding a full-body contraction as you hang with your legs slightly in front of you instead of hanging straight down. Activate your back, like you would in any latissimus dorsi strengthening exercises, and shoulder muscles by rolling your shoulders outward and retracting your shoulder blades. Create tension in your entire upper arm as you focus on engaging each muscle. As you lift your legs in front of you, activate your core, hip flexors, glute, quad, hamstring, and calf muscles. Your focus is on maintaining your head-to-toe muscle contractions throughout the entire movement.
This hanging exercise doesn’t sound as easy now, does it?
Are Passive Dead Hangs Bad For You?
No, quite the opposite: Passive dead hangs are great for you. At first glance, how the dead hang primarily works may seem hard on the shoulders, but the exercise isn’t stressing them. It’s stretching them. As you hang there, your shoulder joint mobility is improving, which is essential to any movement requiring you to lift or move your arms. Even holding the bar for a back squat requires motion from our shoulder joints.
If you suffer from shoulder pain, your first step should be to clear this move with your doctor – safety first, always. But once you do, this move will help you far more than the quick cross-body stretch you likely perform after an intense upper-body dumbbell workout. Dead hangs do a great job of stretching a crucial shoulder tendon, the supraspinatus, which helps with overall shoulder health and mobility.
As with everything, moderation is key. Performing this move multiple times a day places too much strain on your shoulders because you’re overusing them. Instead, target two to three times weekly, follow proper form, and your entire body will benefit from passive dead hangs.
WHAT ARE THE BENEFITS OF DEAD HANGS?
There are different benefits to both dead hang variations due to their different focuses. For example, the passive dead hang stretches and lengthens, so you’ll find many of its benefits relate to this. On the other hand, the active dead hang strengthens, so its key benefits are linked to increasing muscle mass and serving as a stepping point in a pull-up progression plan.
Due to the nature of the hand position and the general “hanging there” requirements, one benefit you’ll receive from both moves relates to your hands and forearms.
It improves your grip strength and forearm muscle. Regardless of whether you’re making this move active or passive, it still requires your hands to grasp a bar and support your body as you hang. This means that your forearm flexors, important for hand grip strength, will work in either position. If you’re interested in gaining strength here, these forearm exercises and this dumbbell forearm workout are great for building mass and strength.
And while it may not be the most glamorous muscle, it is integral to everything you do. Everyday activities like carrying groceries require grip strength. And just imagine how you’d perform any of your favorite lifting moves with weak hands and minimal grip. Heavy (or light) dumbbells, barbells, pull-ups, and rows all become impossible to do when you can’t grasp something properly.
Interestingly, recent research shows that grip strength is a great predictor of future disease, mobility, bone mineral density, fracture risk, depression, and overall strength and body function1.

Benefits of Passive Dead Hangs
Here why’s including passive dead hangs into your routine is a good idea.
1. Improves shoulder joint range of motion:
We spoke about this above, but it’s worth touching on again as it is one of the top benefits of passive dead hangs. Shoulder pain or a lack of mobility impacts everyday functions, like getting a jolt of pain every time you reach for something on a shelf to needing to rotate your shoulders outward as you grasp a barbell to perform a squat variation, like the back squat. By hanging there, you’re enabling the shoulders to stretch within their entire range of motion, which is not something most shoulder stretches can achieve. Between that and targeting the supraspinatus tendon, your shoulders are well on their way to feeling their best.
2. Spinal decompression:
Trust us when we say that decompressing your spine feels so incredibly good. You may not even realize you have tension in your back until after performing this move and feeling the difference. Many factors cause your spine to compress, including sitting at a desk or in a car for significant periods. Jumping and other plyometric moves and performing squats and deadlifts are other common culprits. Let’s take jumping up and down as an example. As you land, your spine absorbs the force from that movement. This places pressure on your discs between your vertebrae, compressing them as they work to absorb your landing shock. Your intervertebral discs are essentially a cushion protecting each vertebra as they absorb shock and stress.
Consider when you have a heavy barbell loaded on your upper back for a back squat: The weight is pushing down on your intervertebral discs, as they absorb the weight and protect your vertebrae from pushing against each other. Your discs are doing their job, and the compression they undergo is standard.
But it’s important to show them some love by helping relieve that compression. Otherwise, you could find yourself dealing with back pain, the last thing anyone wants. The passive dead hang helps relieve disc pressure by oh-so-gently creating space between your vertebrae as it pulls them apart thanks to gravity tugging your body downward. The extra space relieves pressure, enables your discs to expand, and prepares them for future shock-absorbing duties.
3. Upper body stretch:
Our upper bodies feel better just thinking about the deep stretch from a passive dead hang. This move lengthens muscles that can be hard to target with traditional stretching, partially thanks to the downward pull of gravity. However, it also hits a lot of muscles that tend to become short and overactive when they don’t get enough stretching attention, which can lead to muscle imbalances and injury. Your shoulder and arm muscles will get a deep stretch, as will your entire back, including your lats, traps, and rhomboids. It certainly deserves a spot in your lat stretches routine.
4. Better posture:
Those tight back muscles we just discussed can wreak havoc on your posture, so the better stretched they are, the more improved your posture will be. In addition, sitting for long periods due to the dreaded, but quite common, desk job won’t do our posture any favors either. And to make posture matters worse, a compressed spine further leads to a hunched-over look.
Combat all of these effects with the passive dead hang. As it decompresses your spine, stretches out all of your upper body muscles, and counteracts the effects of sitting for long periods, you’ll find your back becomes straighter than ever.
5. Sets you up for progressions:
For those looking to master the pull-up, a great stepping stone is to start with a passive dead hang. Despite hanging there, your upper body muscles are still working to support your entire body weight. Grip strength is also vital for successful pull-ups, and as mentioned, this hang helps improve your hold.
You can also use this exercise as a stepping stone for chin-ups and other exercises that require a strong grip or good shoulder mobility, including the deadlift, bent-over rows, lat pull-downs, and upright shrugs. Any exercise that relies on your hands and forearm flexors to grasp weights will improve as you master the passive dead hang.
Benefits of Active Dead Hangs
Interested in active dead hangs and what they do for you? Here are some of the active dead hangs best benefits.
1. Full-body contraction:
The active dead hangs require isometrically contracting your muscles. Grasping the bar activates your forearm flexors, and as you hold yourself up, your triceps and biceps also engage. Plus, your shoulder and back muscles are all working as you rotate your shoulders and retract your shoulder blades, creating tension throughout the upper, middle, and lower back.
Raise your legs in front of you slightly by using your core, glutes, quads, and hamstrings, holding each muscle contraction for the duration of the move. Our muscles are much more accustomed to contracting concentrically and eccentrically, so a long hold will work them in a new way.
2. Improves core strength:
Core strength is essential for performing moves like pull-ups and chin-ups, so engaging your deep abdominal muscles whenever possible is crucial. A strong core also protects your back during heavy-duty exercises like the deadlift, and when combined with following a cutting diet plan may result in the six-pack of your dreams.
3. Reduces muscle imbalances:
As you hang there, contracting all of your muscles, you’re ensuring one side of your body isn’t neglected. As your strength improves, you can take this further by trying a one-handed active dead hang. There’s no easier way to identify side imbalances than by taking one side completely out of it!
4. Builds serious strength for exercise progressions:
Once you’ve mastered this move, you’re on your way to completing pulls-up and chins-ups. In fact, after performing the active hang, consider reaping the benefits of a weighted vest by putting one on before knocking out your pull-up reps. And because of its emphasis on muscular contraction, you’re also laying the foundation to tackle some hardcore weight lifting moves, including the front lever, in which you grasp a bar, lowering your body horizontally and maintaining it in this position.
Rock climbing is an activity in which you’ll be happy you first mastered the active dead hang since grip and upper body strength are vital for pulling yourself up on uneven rocks and surfaces. It also lays the foundation for more challenging active hangs, including one-handed and performing it on gymnastics rings. Thanks to an increase in lat strength, improvements to your deadlifts and Kroc rows are likely.

Does a dead hang build muscle?
The active dead hang is excellent for building muscle. Your forearms will get a serious workout. And as long as your biceps, triceps, shoulders, and back are contracting, you can build mass in each of them, making it a perfect addition to any upper body workout. In addition, the core, glutes, quads, and hamstrings activate to raise your legs, and you’ll make gains in the lower body.
As with all exercises, progressions will continue building muscle. Once you stop feeling challenged, increase your time, sets, or reps, or consider adding a weighted vest or ankle weights for some extra muscle hypertrophy-inducing effects. Graduating to a pull-up or chin-up is always an option as well.

DEAD HANG MUSCLES WORKED & STRETCHED
Due to the similarities in form, the same muscles work in both variations. The main difference is how the variations work: Many of these muscles are stretched in the passive variation and strengthened in the active dead hang.
Upper Body Activation:
Here are the upper body muscles worked during dead hangs.
- Forearm: The flexor digitorum superficialis, flexor digitorum profondus, and the flexor policus longus are responsible for grip strength and activated in the passive and active dead hang. The other muscles listed here get a good stretch from the passive dead hang, but the forearm muscles are lucky enough to get in a serious workout throughout the exercise.
- Shoulders: Even in the passive dead hang, the deltoids are semi-activated as they work to rotate downward throughout the exercise. Plus, the shoulders are getting a deep stretch that can help with shoulder pain and improve your shoulder joint range of motion. Finally, get ready for even more activation in the active variation as you concentrate on depressing your shoulder blades and simultaneously activating your back muscles.
- Lats: Weight lifting, driving, and sitting too much can cause our lats to shorten. As this occurs, it throws off your posture, causing a hunched upper back and shoulders that round forward, which doesn’t look or feel comfortable. The passive dead hang does an exceptional job of letting them fully length and stretch, creating longer, happier lat muscles that will be more agreeable to using heavier weights in your overhead press and Pendlay rows. Use those lengthened lats in the active dead hang variation as they isometrically contract throughout the exercise.
- Core: Engage your core as you keep your body perfectly still, ensuring your body doesn’t twist or sway side-to-side (dead hang no-nos) while working your deep core muscles in both variations. With the active dead hang, contract them even more as they stabilize your trunk and hold your legs in front of you.
- Rhomboids: These upper back muscles are essential for good posture, and when they’re tight cause a dull pain to radiate between your shoulder blades. Roll your shoulders outward as you hang, as it will help lengthen and reduce tension in your rhomboids. You’ll get more of a stretch with the passive dead hang, so concentrate on this variation if you suffer from upper back pain.
- Trapezius: The traps are fully engaged in the active dead hang since one of its primary functions is shoulder stabilization and moving the shoulder blades. The upper traps help elevate and rotate the shoulder blades upward, while the middle traps retract the shoulder blades, and the lower trap fibers rotate the shoulder blades downward2. These trapezius functions mean the large back muscle is fully activated as you pull your shoulders down during the active dead hang.
Lower Body Muscle Activation:
Your lower body muscles are specific to the active dead hang. The glutes contract as they hold your legs slightly in front of you. Use that mind-muscle connection we frequently discuss to engage your remaining lower body muscles. As you hold your legs in front of you, squeeze the quadriceps, hamstrings, and calves, isometrically contracting them the entire exercise. Concentrate on your full-body contractions, and you can anticipate the following lower-body muscle groups getting worked:
- Glutes
- Hip flexors
- Quadriceps
- Hamstrings
- Calves
HOW TO DO THE DEAD HANG
Ready to correctly perform a dead hang? Here’s how to do it.

How to do a Passive Dead Hang:
- Stand behind a pull-up bar, grabbing it with your palms facing away from you in an overhand grip, with your hands slightly wider than shoulder-width apart. Use a bench or plyo box to step up and reach the bar rather than jumping up for it.
- Grasping the bar, keep your arms straight with a slight elbow bend. Keep your torso and pelvis neutral, with your legs hanging straight down, fully extended, and not touching the floor; tuck your chin. Your arms should be fully extended.
- Despite being a passive hang, your shoulders are still semi-activated, remaining down and back throughout the exercise.
- Concentrate on being still and maintaining a steady breathing pattern as you hang there. When done, place your feet back on the bench or plyo box to get down.
How to do an Active Dead Hang:
- Starting in the same position as the passive hang, grab onto the bar with an overhand grip, with arms fully extended. Begin in the passive hang position, letting your legs hang straight toward the ground.
- Contracting your quads and glutes, raise your legs slightly in front of you. Tuck your pelvis by tilting it slightly, focusing on creating tension throughout your upper and lower body as you retract your shoulder blades and rotate them downward while rotating your shoulders outward.
HOW LONG SHOULD YOU BE ABLE TO DO A DEAD HANG?
No matter your trainee level, here’s how long to target holding your dead hang for.
Beginner:
As with all exercises, in the beginning, it’s always best to start small and quickly work your way up as your neural system makes quick adaptations and gets your motor units firing, all of which are essential for coordination and powerful contractions. Target 20 to 30 seconds for the passive hang. You can try to reach the same for the active hang but may want to start closer to 10 to 15 seconds. If you’re struggling with hanging for any period of time, first build strength using an assisted pull up machine.
Intermediate:
Passive hangers with some weight lifting experience should be able to hang for over a minute, ideally closer to 80 to 90 seconds. For the active version, target 1 minute of dead hang time, working your way up each week.
Advanced:
Passive hangers easily completing 90-second hangs are ready to perform some serious hang time. You can hang anywhere from 2 to 5 minutes for both the passive and active hangs. Be warned: Even the fittest of the fit may have a hard time holding an isometric hold for this long in the active dead hang. Hanging as long as you can, building on your time each week.
Is hanging everyday good?
We do not recommend hanging every day. While there are many benefits, including stretching you out and building strength, practicing moderation is essential.
This exercise looks deceivingly easy, especially with the passive version, as you’re just hanging there, right? But despite its stretching benefits, it’s still stressing your upper body. Overdoing it could lead to shoulder joint strain, elbow pain, and a weakened grip. Target 2 to 3 times per week, and get all the benefits and none of the overuse strain.
HOW TO PROGRAM DEAD HANGS
Beginners incorporating the passive hang into their routine should aim for two sets of 20 to 30 seconds each. The active hang should start with two sets of 10 to 20 seconds, continuing to increase your time each week, even if only by a few seconds. Rest one minute between sets.
Intermediate lifters can target two to three sets, lasting 80 and 90 seconds each, resting 1 to 2 minutes between sets. Aim for two to three sets, one minute each, for the active hang, increasing your time as you progress.
For advanced lifters ready to passively dead hang with the best, program one set ranging from 2 to 5 minutes. Active hangers should follow a similar format, targeting one set between 2 and 4 minutes. After you reach this point, it’s time to move to a progression.
We recommend adding the active dead hang to the beginning of your workouts to help warm up your muscles and saving the passive dead hang variation for your cool down when your muscles are craving long, deep stretches. Try using the active dead hang as a warm up for this back and shoulders workout.
Dead Hanging Exercise: Variations
Looking for more variations of the traditional dead hang to try? Check out the video below, which in addition to showing you how to do dead hangs, also covers the supinated dead hang, gymnastics swings dead hang, tau grip dead hang, and one arm dead hang.
Include Different Dead Hang Versions for More Workout Variety
Once this becomes a staple in your workout routine, you may crave some variety in your moves while still reaping the same great benefits of the dead hang. Switch your overhand grip to an underhand, neutral, narrow overhand, or suicide grip, meaning no thumbs.
Add instability to the movement by performing it on gymnastics rings, or use a thicker bar that is extra challenging to grip. You can also work one side harder while identifying pesky muscle imbalances by performing the single arm dead hang. The options are endless.
Happy hanging!
The dead hang exercise is great for improving your grip. Wondering why that’s important? Check out our article on the 5 Benefits of Grip Strength!

References:
- Bohannon, Richard W. “Grip Strength: An Indispensable Biomarker for Older Adults.” Clinical Interventions in Aging, vol. 14, 1 Oct. 2019, pp. 1681–1691, www.ncbi.nlm.nih.gov/pmc/articles/PMC6778477/, 10.2147/CIA.S194543.
- Ourieff, Jared, and Amit Agarwal. “Anatomy, Back, Trapezius.” StatPearls Publishing, 6 Dec. 2018, www.ncbi.nlm.nih.gov/books/NBK518994/.


