


")
This wonderful as well as sour cherry pie has a beautiful cherry filling up covered with a flawlessly gold, buttery crust. It’s an affordable treat made with basic active ingredients, yet does not stint the classy tastes!
After refining this keto cherry pie, I understood I required to make the conventional variation to match. Presenting the ideal treat for summer season: timeless cherry pie!
This basic cherry pie dish looks as well as tastes classy, yet is remarkably very easy to make with fresh, icy, or tinned cherries as well as basic baking staples. Bring your newly baked pie to the summer season outing or dinner, or appreciate it as a post-barbecue treat. Every person will certainly take pleasure in the sharp cherry dental filling as well as buttery crust!
Tabulation
- Why this dish functions
- Active ingredients required
- Just how to make cherry pie
- Tips to make the most effective dish
- Storage space directions
- Suggested devices to make this dish
- Extra self-made pies to attempt
- Regularly asked inquiries
- Cherry Pie Dish
Why this dish functions
Making a cherry pie from square one is less complicated than you might believe. And also much like my blueberry pie, every piece showcases seasonal summer season fruit covered in a buttery bread.
- Tart as well as cherry dental filling The celebrity of the program below is, certainly, the cherry dental filling. The cherries are prepared down in a pan on the range, after that mixed with lemon juice, cinnamon, almond essence, as well as corn starch up until it tackles a beautiful gooey uniformity.
- Your option of cherries While fresh cherries are the most effective option throughout summer season, you can make this crowd-pleasing pie year-round with either icy or canned cherries.
- Easy active ingredients Regardless of the classy discussion as well as tastes, this cherry pie dish is very easy to create with a handful of affordable as well as easy-to-find active ingredients.
Active ingredients required
You require a list of uncomplicated active ingredients to make this remarkable treat. Utilizing store-bought pie dough as well as tinned cherries makes it also easier! Below’s what you require:
For the pie crust:
- Pie crust dough Any type of 9-inch store-bought pie dough functions well below. You can likewise make the crust on your own or utilize my keto pie crust.
- Egg The egg is defeated, after that cleaned over the pie dough to motivate browning.
- Water For the egg laundry.
For the cherry pie dental filling:
- Cherries You can make use of fresh, tinned, or icy (thawed out) matched cherries. If utilizing tinned cherries, drainpipe as well as get the cherry juice.
- Sugar Powdered white sugar is best.
- Lemon juice The acid from the lemon juice assists stabilize the flavor from the cherries in the dental filling as well as illuminates every bite.
- Corn Starch To enlarge the cherry dental filling.
- Almond essence This includes a tip of nuttiness to the dental filling. Do not hesitate to leave it out if you have a hostility to nuts.
- Cinnamon To include a refined heat to the cherry dental filling. You can likewise include nutmeg, cardamom, or various other cozy flavors you such as.
Just how to make cherry pie
This dish begins by making the cherry filling up prior to it’s put right into the pie crust as well as baked to gold excellence. Below’s exactly how it’s done:
Action 1– Simmer the cherries
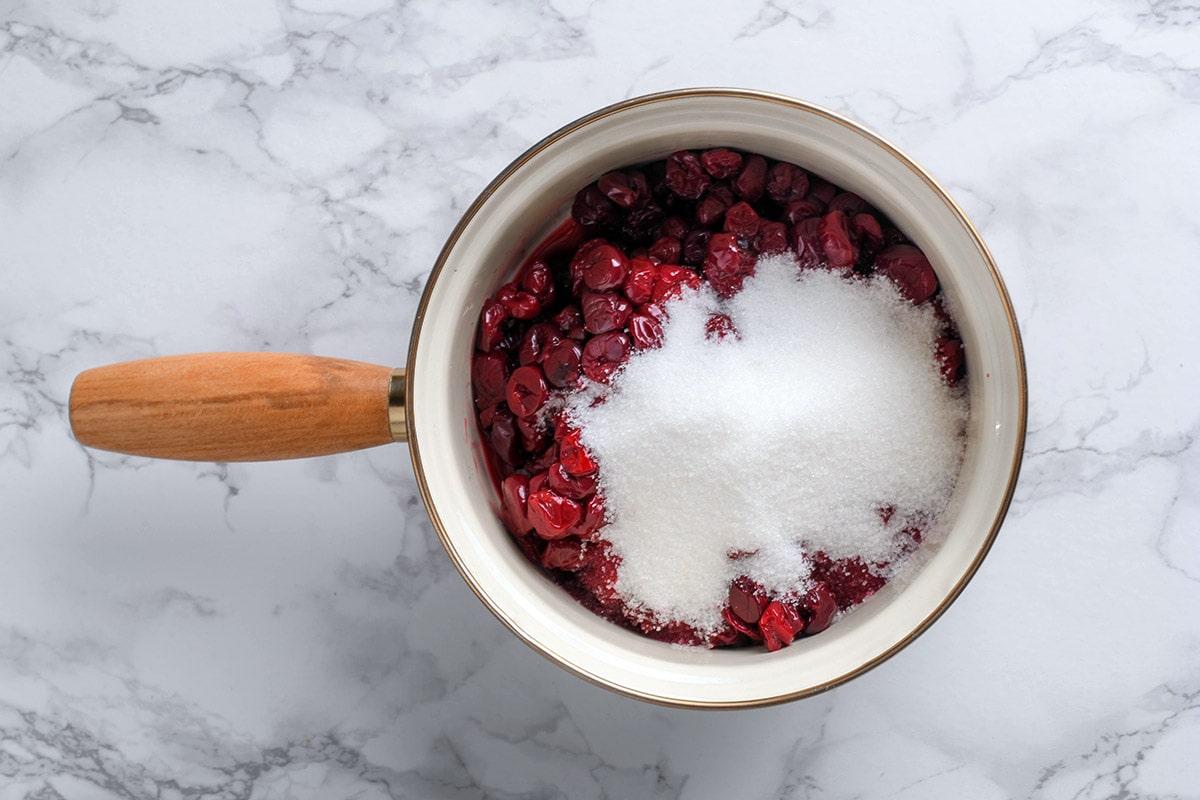
Include the cherries, several of the cherry juice, as well as sugar to a pan on the range, as well as bring it approximately a simmer. Simmer up until the sugar is liquified.
Action 2– Complete the cherry dental filling
Make a corn starch slurry by mixing the corn starch, lemon juice, as well as booked cherry juice in a little dish. Mix the slurry, together with the cinnamon as well as almond essence, right into the cherry filling up up until it comes to be gel-like.

Take the pot with the cherries off of the warm as well as established it apart to cool down entirely.
Action 3– Prepare the crust
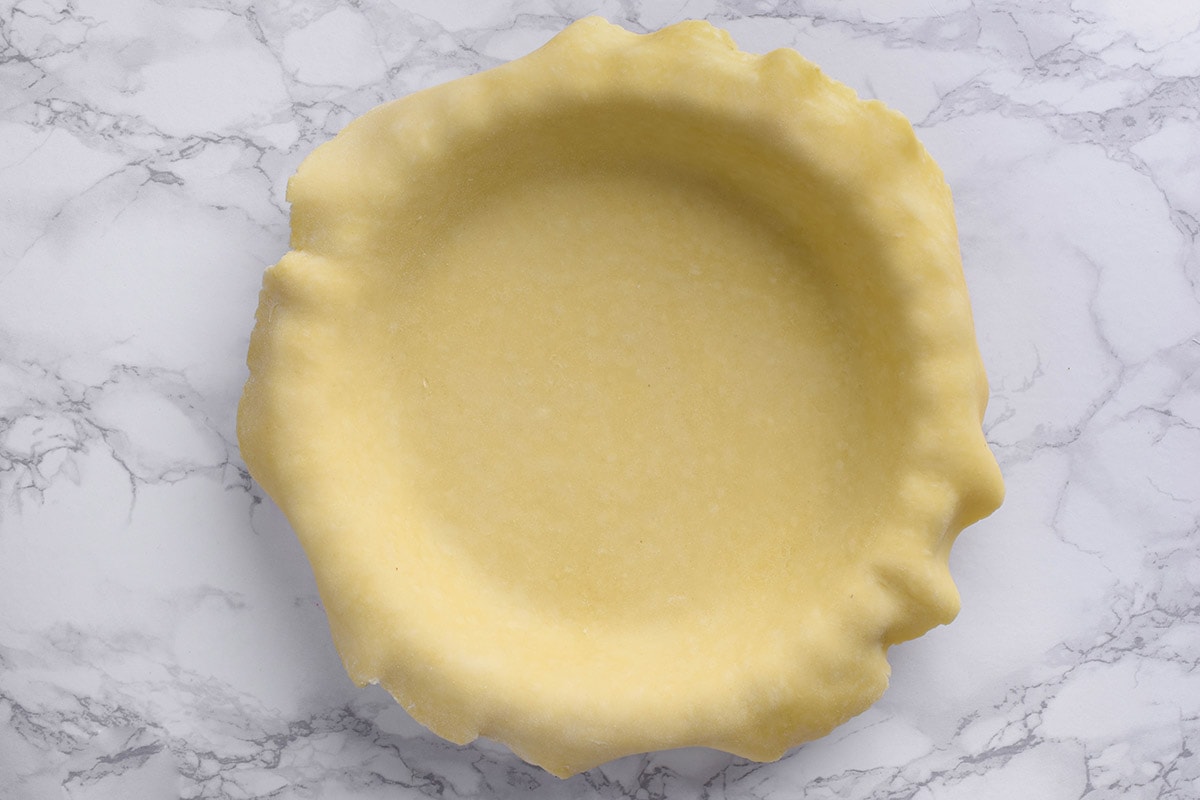
Present one item of pie dough right into a circle that’s somewhat bigger than your pie plate. Lay the rolled-out dough right into the pie plate, ensuring that the excess dough is hanging over the sides.
Action 4– Construct
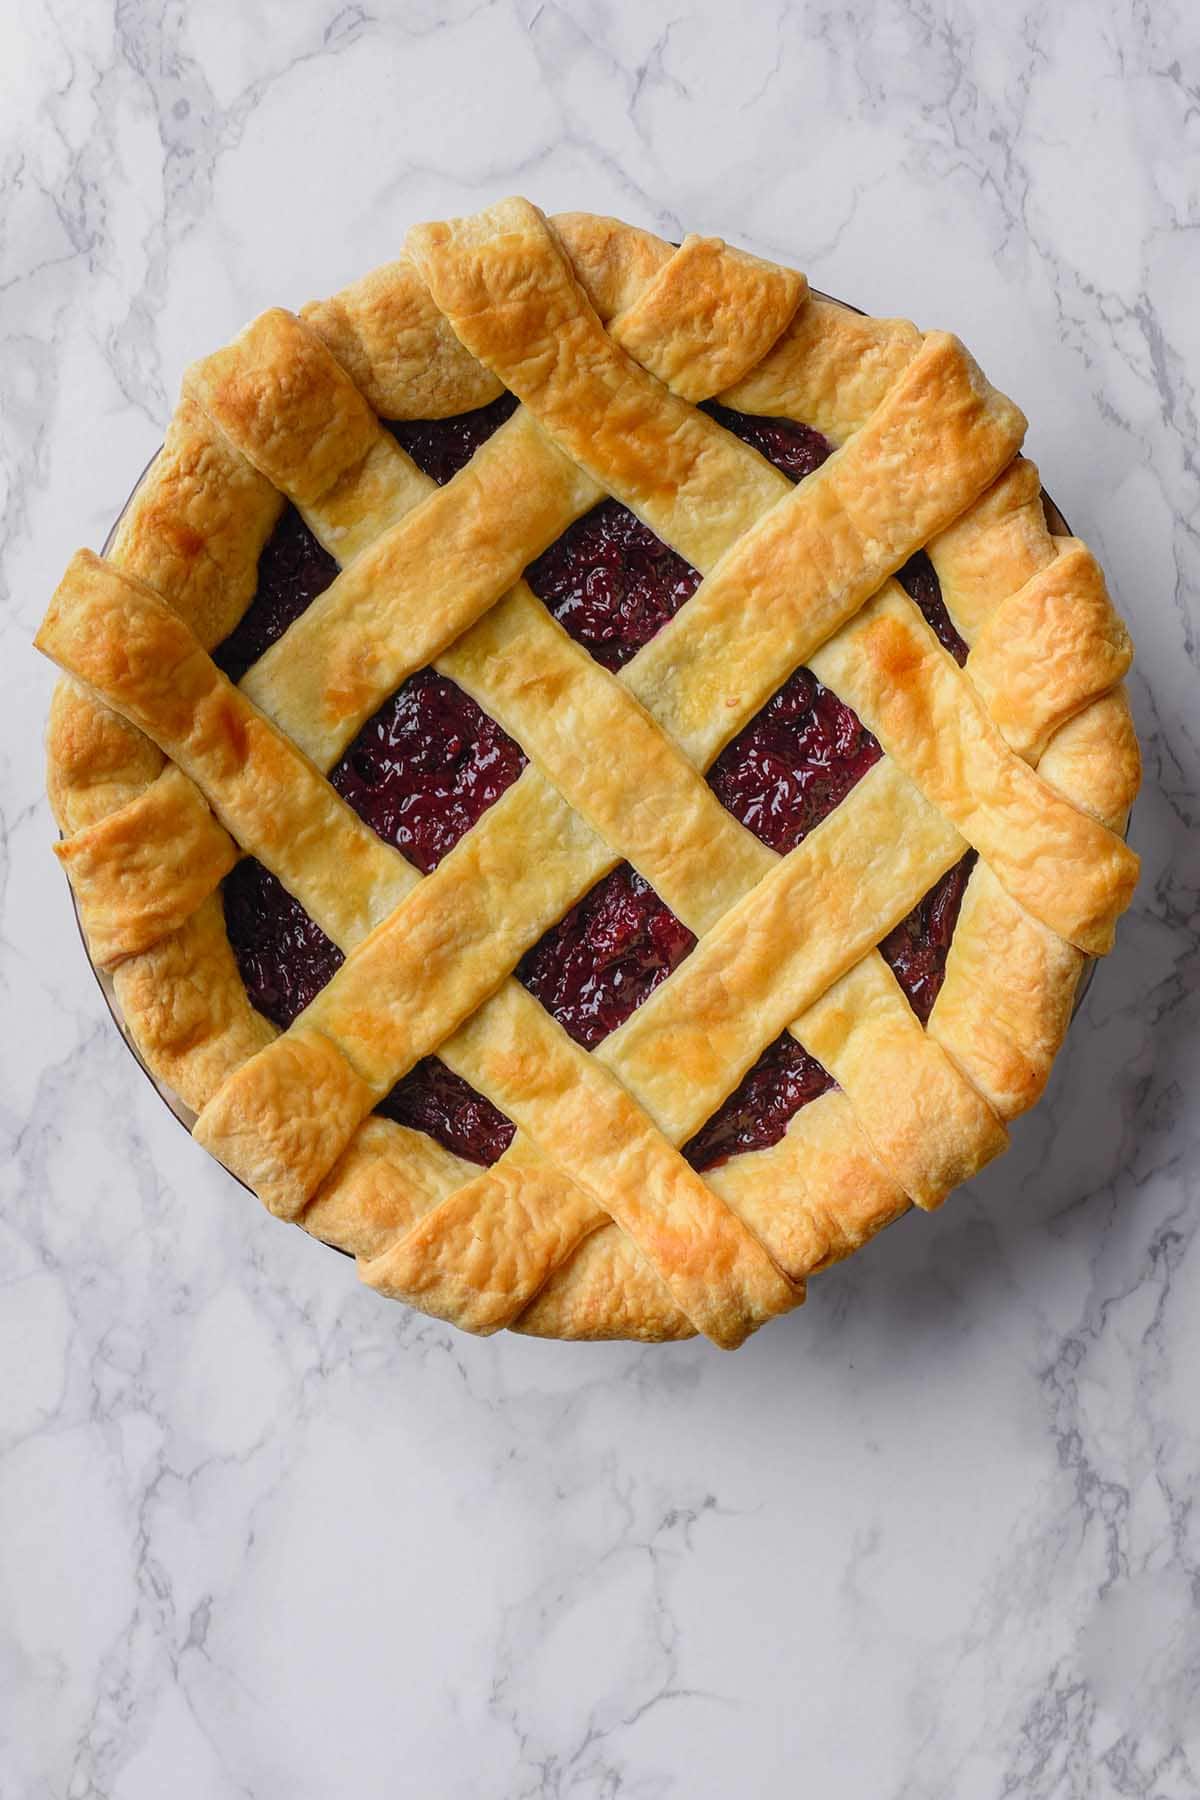
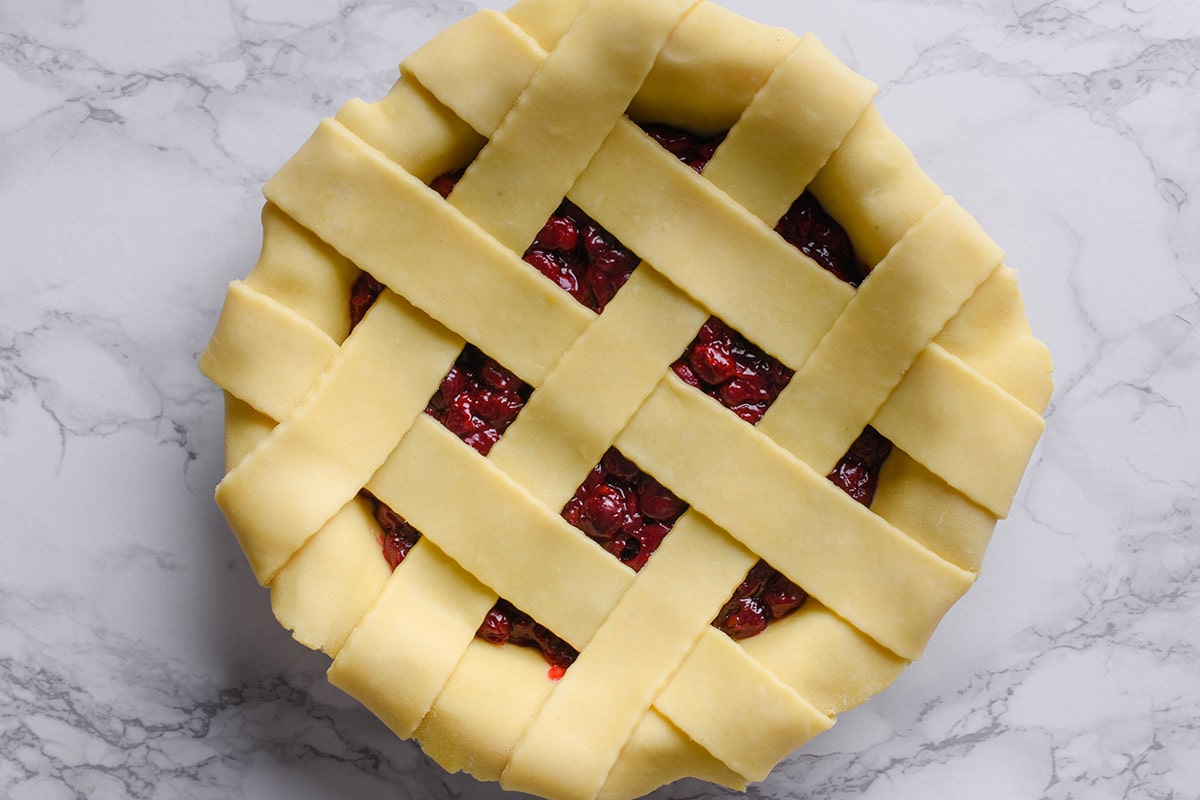
Put the cherry filling up right into the crust. Present the 2nd item of dough as well as suffice right into 1-inch thick strips. Lay the strips in addition to the cherry filling up to make a latticework wave.
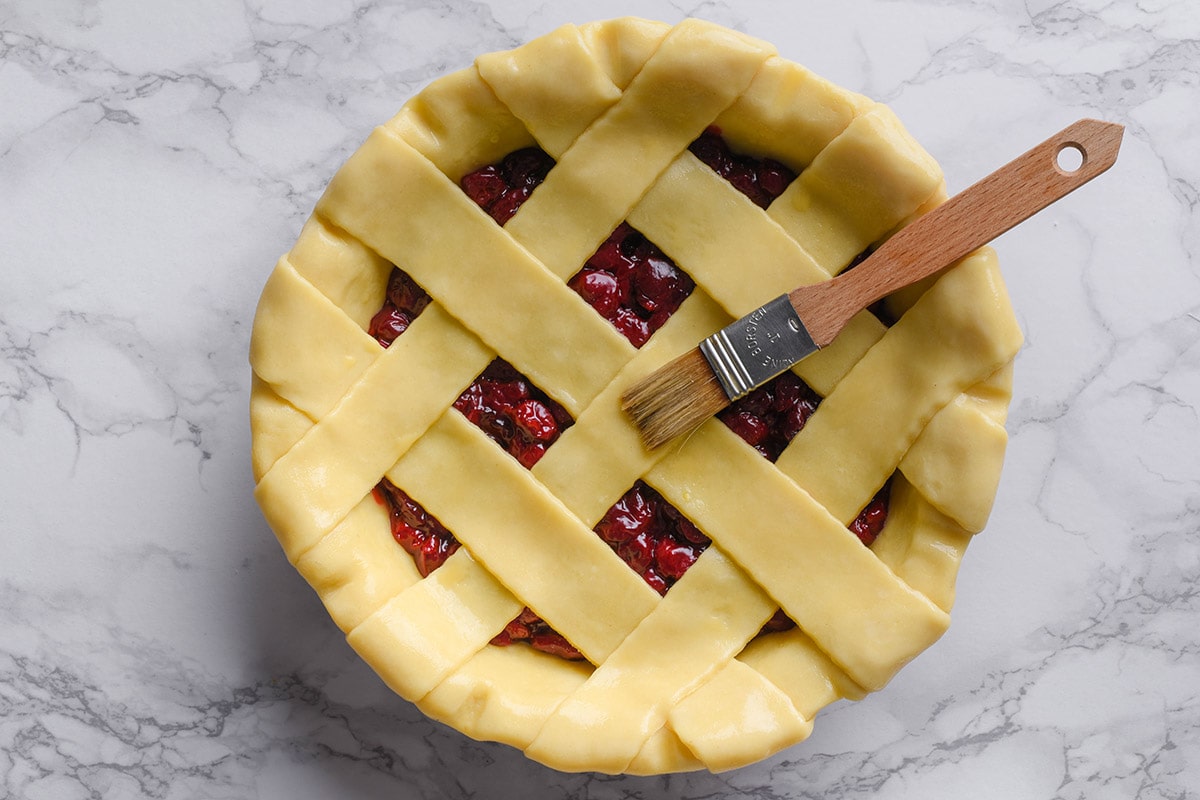
Tip 5– Include the egg laundry
Beat the egg with the water in a dish. Brush it over the crust, after that leading with rugged sugar (optional).
Action 6– Bake
Cook the cherry pie at 425ºF for 10 mins, after that reduced the warm. Cover the pie with a layer of aluminum foil in the last 10 mins to stop the crust from coming to be as well dark.
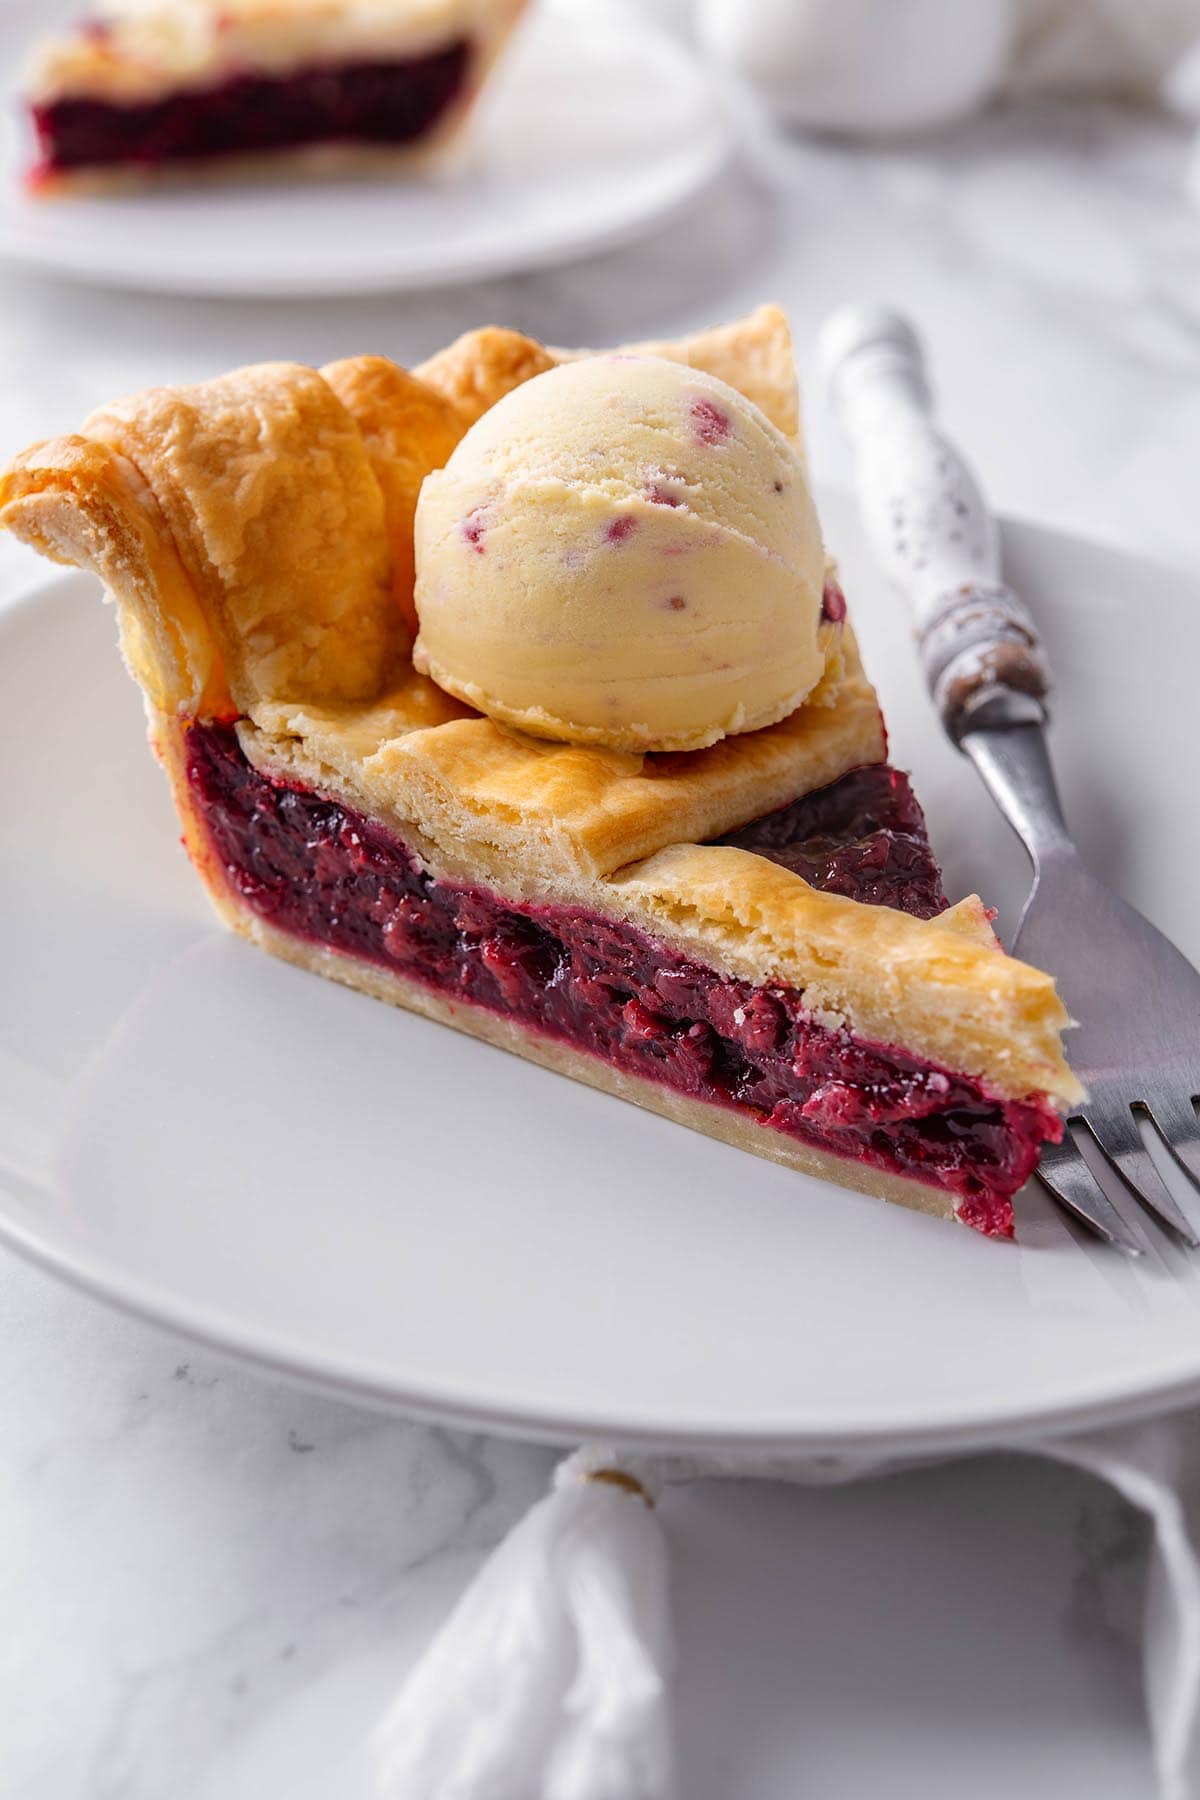
Take the pie out of the stove as well as established it apart to cool down prior to cutting as well as offering. Delight in!
Tips to make the most effective dish
- Fresh as well as brilliant red cherries will certainly look the most effective in this pie! However it will certainly still taste terrific if you make use of icy or canned cherries rather.
- If you’re making the pie with icy cherries, see to it to thaw them beforehand. Drain pipes the excess water yet conserve the cherry juice.
- To stop the pie crust from reducing, layer as well as kink the excess pie dough as well as latticework strips under the sides.
- Did you lack cherries? Do not hesitate to mass up the full of sliced strawberries or rhubarb.
- You can repurpose the cherry dental filling as a covering for cheesecake!
- For the utmost treat, offer each piece of cherry pie with an inside story of vanilla gelato, coconut gelato, or whipped lotion.
Storage space directions
To make in advance: Present the pie dough as well as lay it on the pie plate approximately 5 days ahead of time. Maintain it covered as well as in the refrigerator up until it’s time to make the pie.
To save: The remaining baked as well as cooled down pie must be covered as well as saved in the refrigerator. In this manner, it will certainly remain fresh for approximately 2 weeks.
To ice up: Maintain the leftovers in a closed container as well as freeze for approximately 6 months.

Extra self-made pies to attempt
Regularly asked inquiries
Sour cherries, often called pie cherries, are several of the most effective fresh cherries you can make use of in cherry pie. Pleasant cherries likewise function, yet it assists to reduce the sugar to 3/4 mug so the dental filling isn’t excessively wonderful.
If all you have are icy or canned cherries in the house, do not hesitate to utilize them rather! They function equally as well as well as are a terrific affordable option to fresh.
No, the crust does not require to be par-baked prior to the cherry dental filling is included. Par-baking or blind baking is just essential when the pie filling up will certainly not prepare in the very same quantity of time as the dough.
Beginning the pie in a 425ºF stove assists the crust tighten, which avoids it from taking in the cherry juices as well as obtaining soaked. The high warm will certainly likewise even more enlarge the cherry dental filling. When the temperature level is decreased, the crust can cook uniformly as well as without burning.
Drain pipes the matched cherries as well as gather 3 tbsps of the juice.
In a little pan, include the cherries as well as sugar. Position it over tool warm, ring to a simmer, as well as chef up until the sugar is liquified.
Whisk corn starch, lemon juice, as well as cherry juice in a dish, together with the cinnamon as well as almond essence. Include the corn starch slurry to the cherries. Mix it as well as prepare the cherries up until gel-like uniformity. Get rid of the cherries from the range, as well as great entirely.
Present the pie dough right into a slim circle, bigger than your pie tin. Area one component of the dough right into the pie tin. Make certain your sides are looming.
Load the crust with cherry dental filling.
Present the 2nd item of the dough, somewhat thicker than the lower dough. Cut the rolled dough right into 6 to 8 strips, around 1 inch thick. Develop a latticework wave in addition to the pie.
Beat the egg with water as well as brush all of it over the crust. You can furthermore spray the rugged sugar in addition to the pie.
Preheat stove to 210C/425F.
Cook the pie in the warmed stove for 10 mins. Minimize warm as well as cook the pie for an additional 50 mins. In the last 10 mins, cover the pie with light weight aluminum foil.
When baked, great the pie entirely prior to cutting as well as offering.
Offering: 1 piece Calories: 266 kcal Carbohydrates: 44 g Healthy Protein: 3 g Fat: 9 g Salt: 143 mg Potassium: 157 mg Fiber: 2 g Vitamin A: 56 IU Vitamin C: 5 mg Calcium: 17 mg Iron: 1 mg INTERNET CARBOHYDRATES: 42 g
Disclosure: This article might consist of associate web links. I might gain a little compensation for my recommendation, suggestion, endorsement, and/or web link to any type of service or products from this site.


